Difference between revisions of "Developing ccPublisher with Eclipse"
m (Developing ccPublisher on Windows moved to Developing ccPublisher with Eclipse) |
|
(No difference)
| |
Revision as of 14:05, 29 June 2006
We have found the following tool configuration works well for developing ccPublisher on Windows platforms. An alternative is to use the cross platform Wing IDE; see Developing ccPublisher with Wing for details.
Contents
Tools Used
Installation and Configuration
Begin by downloading and installing the Eclipse SDK for Windows. The Eclipse SDK contains the basic integrated development environment for Java, and more importantly a framework which may be used by other tools to add support for other languages and technologies. Installing Eclipse for Windows is simply a matter of unzipping the file you downloaded; eclipse.exe is the primary executable.
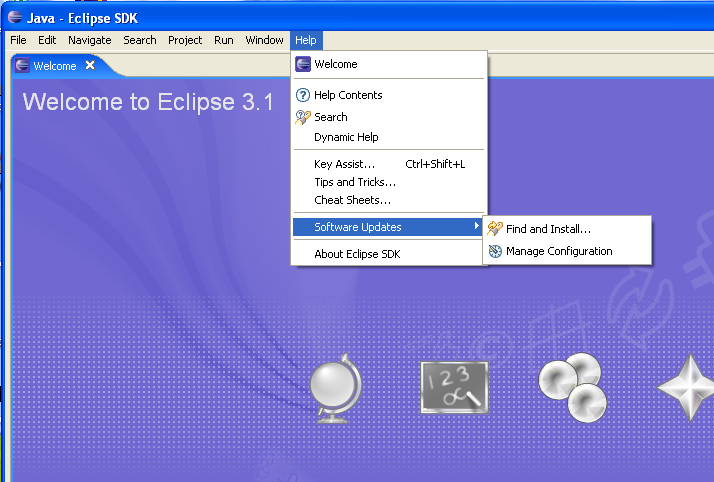
After installing Eclipse, start the environment. All other installations may be done using Eclipse's integrated update manager. After starting Eclipse and selecting a Workspace location, go to the Help menu and navigate to the Software Updates sub-menu. Select Find and Install....
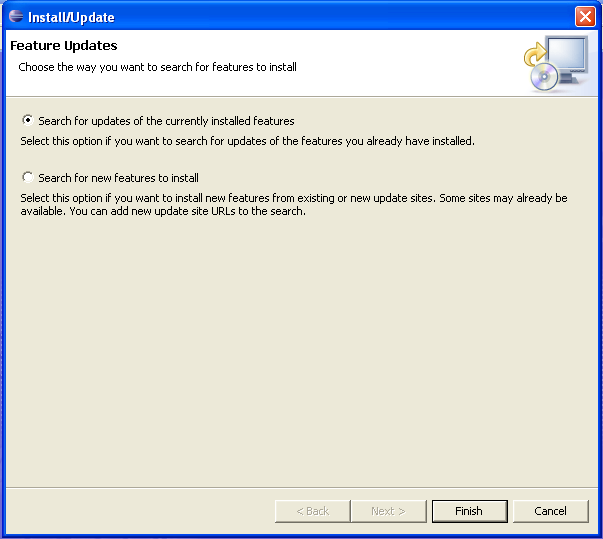
Select Search for New Features to Install and click Next.
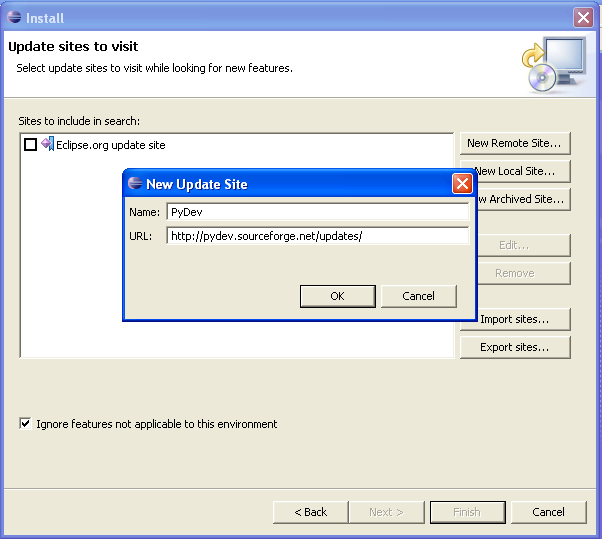
You now need to add the update sites for the new features to install. Click New Remote Site.... Enter PyDev for the name, and the PyDev update URL, http://pydev.sourceforge.net/updates/. Click OK and the site will be added.
Repeat the process for the other two update sites:
- Subclipse (http://subclipse.tigris.org/update_1.0.x)
- EclipseNSIS (http://eclipsensis.sf.net/update)
All three update sites should be checked; click Finish. Eclipse will visit each update site and download a list of features or updates available from each.
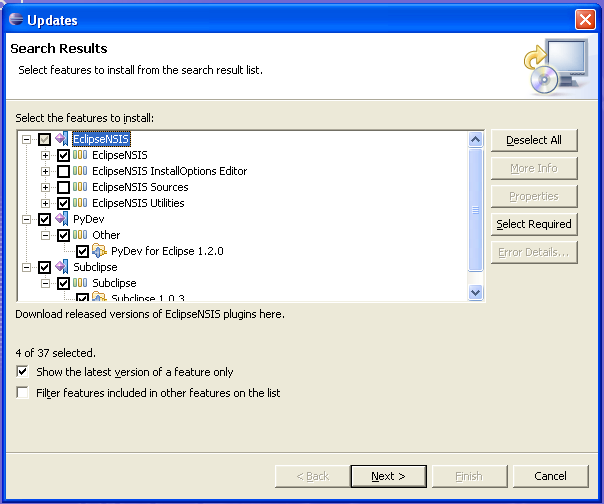
When Eclipse shows the list of updates available, select the following options:
- PyDev -> Other -> PyDev for Eclipse
- Subclipse -> Subclipse -> Subclipse 1.0.3
- EclipseNSIS -> EclipseNSIS
- EclipseNSIS -> EclipseNSIS Utilities
After the four features are selected, click Next.
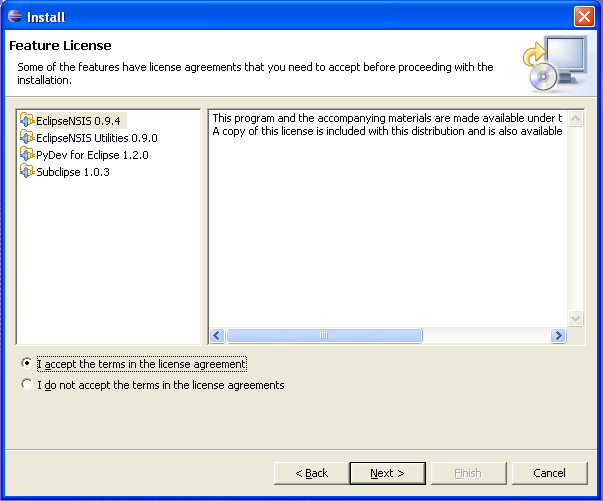
Indicate acceptance of the license agreements and click Next.
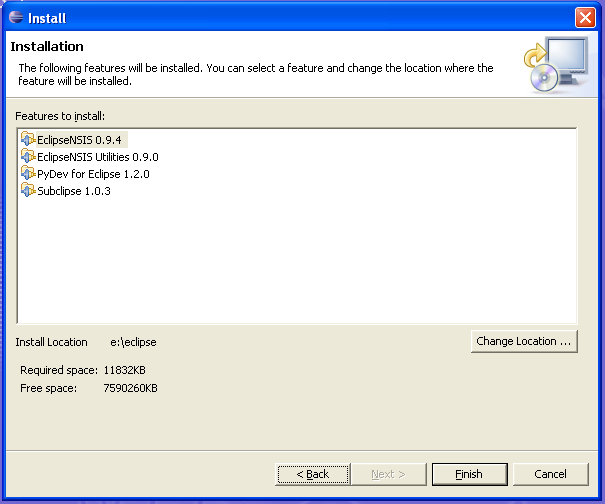
Finally, click Finish to complete installation.
Eclipse will download each update and install it. You may be prompted to confirm installation of individual features; simply click Install or Install All. You will be prompted to restart Eclipse after the installation completes.
Configuring PyDev
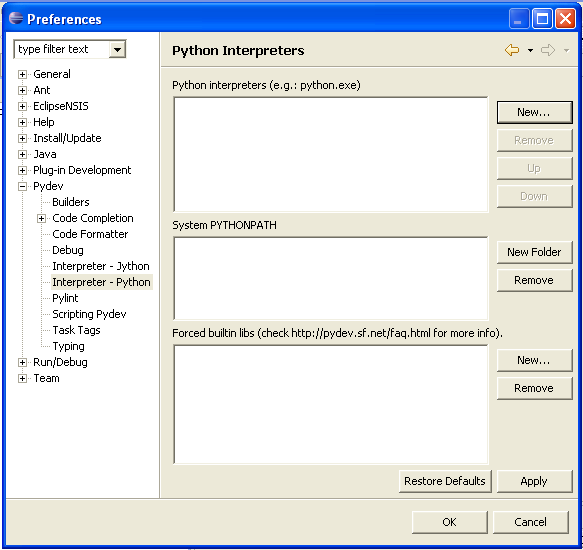
Before you can create a PyDev project you must configure a Python interpreter. After Eclipse restarts go to the Window menu and select Preferences. Select PyDev -> Interpreter - Python from the tree on the left side of the window.
Click the New... button and navigate to your Python interpreter executable (usually c:\python24\python.exe).
Checking out a Sandbox
After Eclipse restarts, click the Window menu, and then the Open Perspective sub-menu. Select SVN Repository Exploring. If not listed in the sub-menu, click Other... for a complete list of available perspectives.
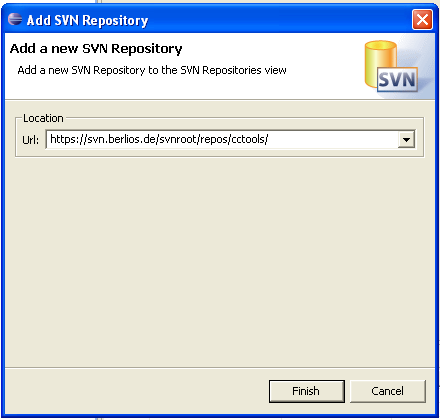
Click the Add SVN Repository button and enter the repository URL, https://svn.berlios.de/svnroot/repos/cctools/. Click Finish and Eclipse will contact the repository.
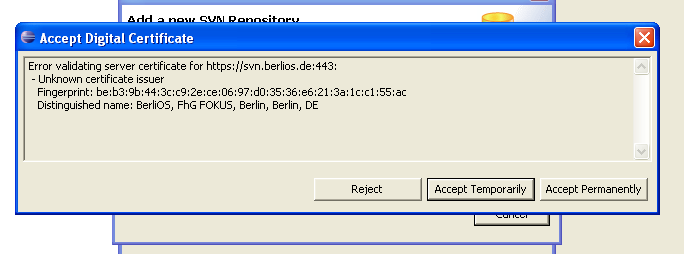
You may be prompted to accept the certificate for the server. Either click Accept temporarily or Accept permanently.
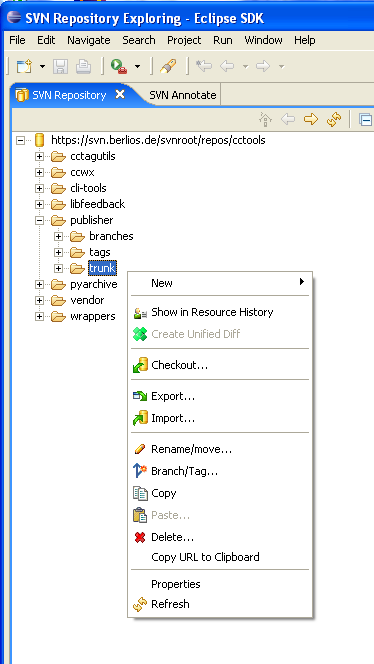
If Eclipse validates the repository properly you will now be able to browse the repository tree and select the segment(s) to check out. For ccPublisher, navigate to the publish module and select the trunk. Right-click the trunk and select Checkout....
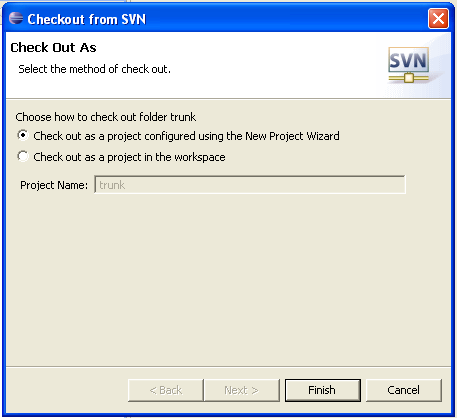
Select Checkout as a project configured using the New Project Wizard and click Finish.
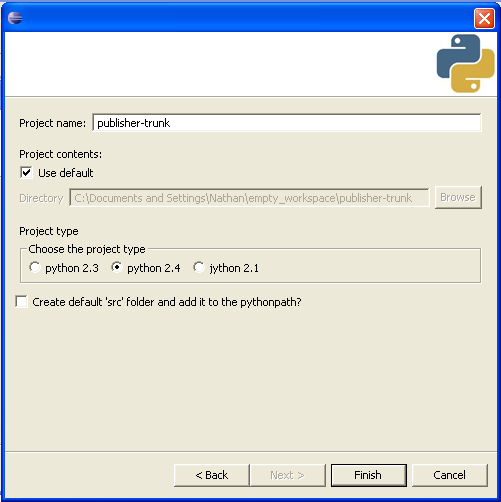
Eclipse will retrieve projects information from the Subversion server and start the new project wizard. Select PyDev -> Pydev Project from the wizard and Next. Provide a local name for the project and uncheck the Create default src directory. Click Finish to create the project and checkout the source tree.
After the project is checked out, Eclipse will switch into the Pydev perspective.
Running within Eclipse
To run ccPublisher from within Eclipse, right click on the ccp.py item in the Navigator and select the Run As... submenu. You can create a default run configuration by simply clicking the Python Run... item. This will create a run configuration that can later be editted by selecting the Run... item from the Run As... submenu.
Debugging with PyDev
PyDev includes an integrated debugger which allows you to set breakpoints, stop execution of the program and inspect the state of the running application. To perform basic debugging, run the application as described above with a simple change: instead of using the Run As... right-click sub-menu, use the Debug As... sub-menu. You can also set breakpoints in the code by double-clicking in the gray column at the far left side of the editor. For more details on using PyDev, see the PyDev home page.
Committing Changes
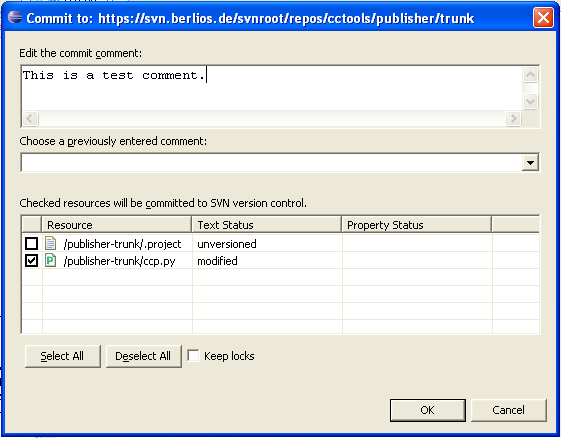
To commit local changes to the Subversion server, right-click on the item to commit and select the Team submenu and click the Commit... item. Eclipse will display the commit information dialog which allows you to enter a log message and select which resources you are committing. This allows you to divide your changes into logical sets. Simply check (or uncheck) the box next to each item you wish (or do not wish) to commit and provide a log message. The log message should describe what the change corrects, implements, etc. If you are committing work for a specific issue include the issue number in the log message. After entering your log message, click the OK button.
Updating your Checkout
To update all or part of your checkout from with Eclipse, right-click on the item to refresh and select the Team submenu. Click the Update menu item to retrieve updates from the server. By default the update operation will update the selected item and all sub-items; therefore performing an update for the top-level project directory will update the entire project.
