Difference between revisions of "Publish/Text/Blogger"
(→Community resources) |
|||
| (One intermediate revision by the same user not shown) | |||
| Line 21: | Line 21: | ||
[[Image:Blogger_publish5.jpg|border|link=]] | [[Image:Blogger_publish5.jpg|border|link=]] | ||
| + | |||
| + | ===Community resources=== | ||
| + | * This great slide show by Erica Starr takes you through the process of choosing and adding a CC license to Blogger: http://www.slideshare.net/EricaStarr1/how-to-use-creative-commons-licenses | ||
Latest revision as of 16:14, 2 May 2013
How to publish on Blogger
Start by choosing a license for your blog at http://creativecommons.org/choose/. The resulting page will contain the appropriate icons and HTML code. Keep this page open in a separate tab or browser window.
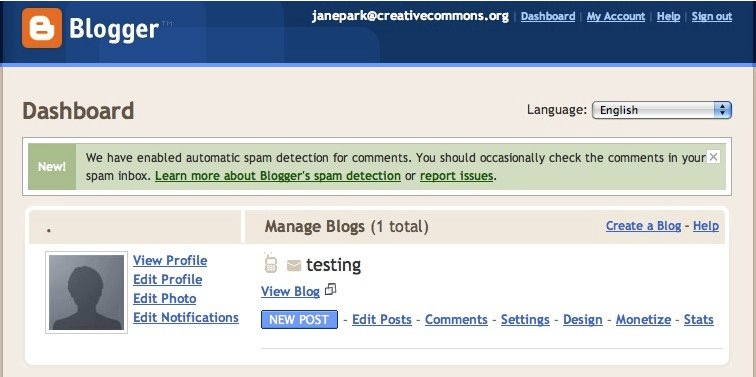
1. Go to blogger.com and sign in with your Google account. Once signed in, you will be directed to the dashboard. Select 'Design' of the blog you wish to CC license:

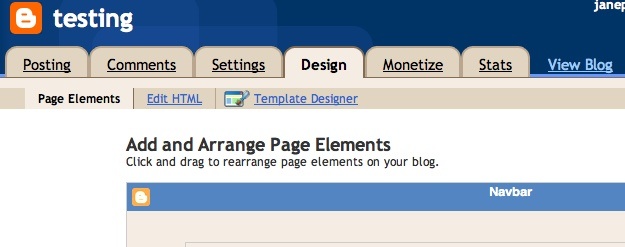
2. Under the 'Design' tab, select 'Edit HTML':

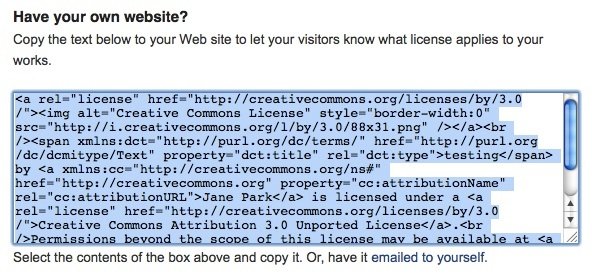
3. Refer back to the CC license chooser result. Copy the HTML code provided by highlighting it with your mouse and hitting ctrl-c (command-c on a Mac).

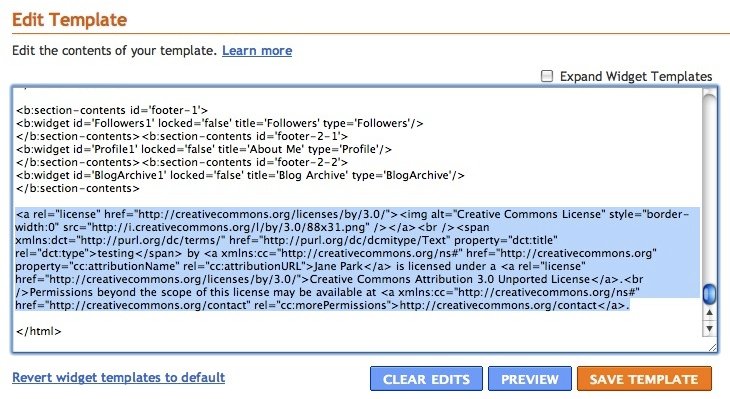
4. Go back to Blogger 'Edit HTML' page. In the 'Edit Template' section, scroll down near the end of the template code, before you see </html> (or </body></html>), and paste in the code copied in the previous step by hitting ctrl-v (command-v on a Mac):

5. Click 'Save Template'. If you 'View Blog', you should see the CC license icon with accompanying information (if you filled out the metadata fields in the license chooser) at the bottom of your blog:

Community resources
- This great slide show by Erica Starr takes you through the process of choosing and adding a CC license to Blogger: http://www.slideshare.net/EricaStarr1/how-to-use-creative-commons-licenses