Difference between revisions of "CcPublisher Self-Hosting"
| Line 1: | Line 1: | ||
| + | [[Category:CcPublisher]] | ||
| + | [[Category:opensource]] | ||
| + | [[Category:Technology]] | ||
| + | |||
If you are interested in licensing your work but would prefer to host it at your own website, ccPublisher can generate a piece of HTML which contains machine-readable information about the license you selected. This allows people who download your work with [[Embedded Metadata|embedded license information]] to validate the license. | If you are interested in licensing your work but would prefer to host it at your own website, ccPublisher can generate a piece of HTML which contains machine-readable information about the license you selected. This allows people who download your work with [[Embedded Metadata|embedded license information]] to validate the license. | ||
| Line 8: | Line 12: | ||
===Step five: Choose your destination=== | ===Step five: Choose your destination=== | ||
| + | |||
| + | [[Image:ccP2-SelfHost-Screenshot-10.png]] | ||
| + | |||
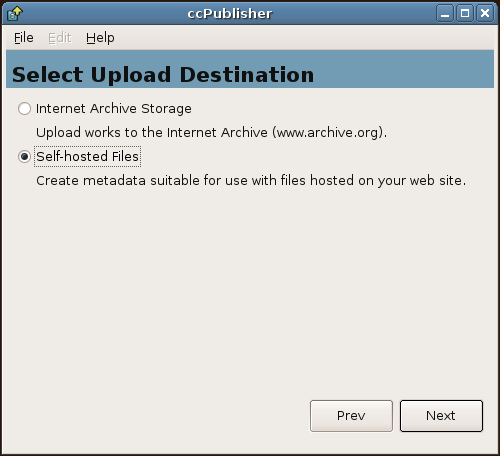
| + | Select ''Self-hosted'' from the destination list. | ||
| + | |||
| + | ===Step six: Enter the Verification URL=== | ||
| + | |||
| + | [[Image:ccP2-SelfHost-Screenshot-11.png]] | ||
| + | |||
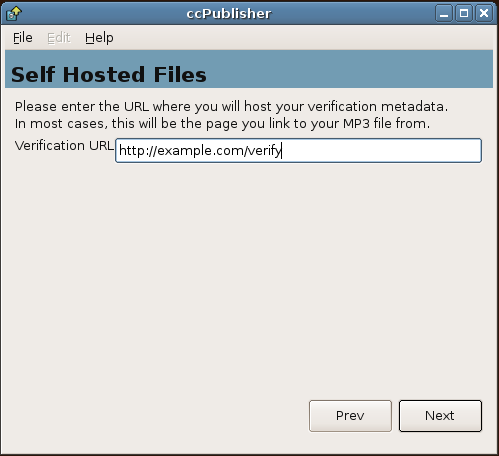
| + | The verification URL is URL of the page which you will paste the verification HTML into. The verification HTML contains a hash of the file you are licensing, which allows software to validate the file's license. | ||
| + | |||
| + | ===Step seven: Save the Generated HTML=== | ||
| + | |||
| + | [[Image:ccP2-SelfHost-Screenshot-12.png]] | ||
| + | |||
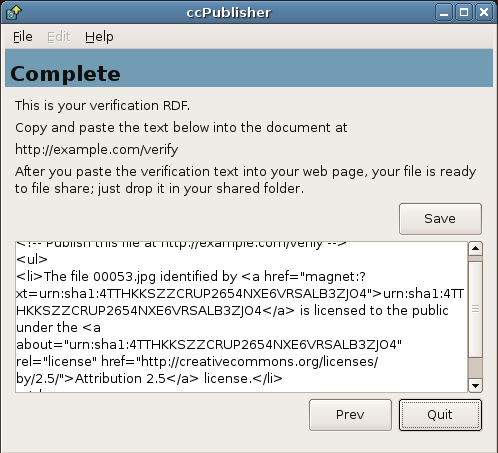
| + | Copy and paste the generated HTML into you web page! | ||
Latest revision as of 23:37, 19 May 2006
If you are interested in licensing your work but would prefer to host it at your own website, ccPublisher can generate a piece of HTML which contains machine-readable information about the license you selected. This allows people who download your work with embedded license information to validate the license.
Contents
Using ccPublisher for Self-Hosting
Step one through four
Complete steps one through four as described on the ccPublisher main page.
Step five: Choose your destination
Select Self-hosted from the destination list.
Step six: Enter the Verification URL
The verification URL is URL of the page which you will paste the verification HTML into. The verification HTML contains a hash of the file you are licensing, which allows software to validate the file's license.
Step seven: Save the Generated HTML
Copy and paste the generated HTML into you web page!


